Deploy your server-side swift project to Vapor cloud
Testing Vapor cloud for hosting a server-side Swift application. Last week I watched Tanner Nelsons try!Swift NY talk about Vapor. Tanner is the person behind the Vapor framework, so I was pretty excited when someone tweeted the talk. I’ve been keeping my eye on server-side Swift development for about a year now and especially on Vapor. I haven’t used it for any commercial app yet, but I’ve had a project running on Heroku for almost a year. In case you want to know more check out: Friend service . It works as a backend for an example Friend application. It’s designed with MVVM and I created it for an example project of the architecture.
What is Vapor cloud?
Getting started with the Vapor cloud
I assume that you have your project up and running in localhost so I am not going explain how to do that in this article. (check how to set up backend with swift if you want to know more about setting up a project)
There are a few steps you need to make to get service up and running:
- Sign-up to Vapor cloud
- Set up a git repository
- Update Vapor
- Deploy using the command line
Sign up for Vapor cloud
First thing you need to do is to create your profile on vapor cloud: https://vapor.cloud. Click sing-up and follow the instructions. After completing the sign up process, you’ll see the dashboard of Vapor cloud.
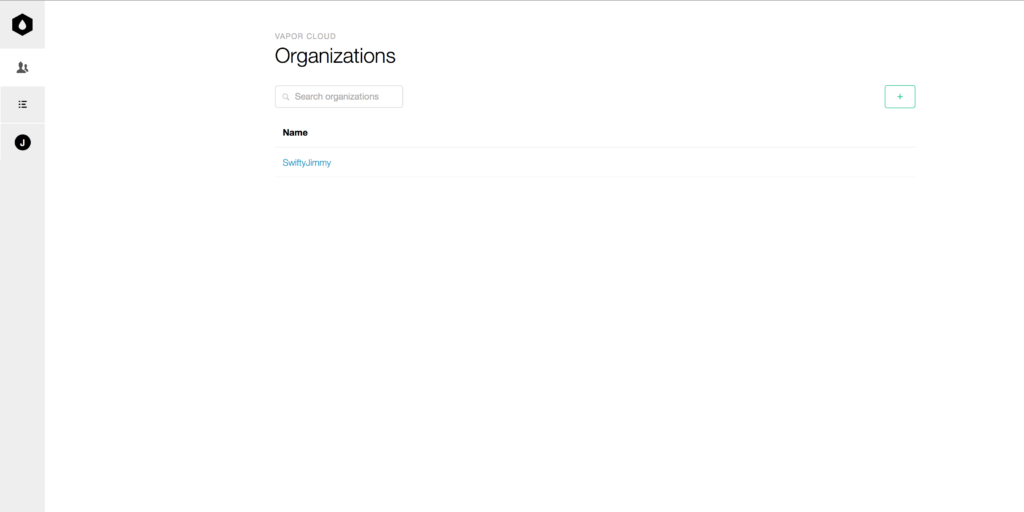
Vapor cloud dashboard
On the menu on the left side, you can see the dashboard icon, organizations, and your profile. I created an organization named “SwiftyJimmy”. I also a project called “Swifty Jimmy Applications”. Inside a project, you can have many applications, but let’s not create the app yet. It is actually very easy to do on the command line, so let’s do it from there.
Git repository
There are plenty of tutorials about git, so I am not going to explain it here. I have mine in GitHub: FriendService. In case you want to deploy your own project, make sure you have a git repository.
Update Vapor
Now, make sure to update Vapor to have all the tools up to date. You can do that by typing in terminal:
|
1 |
brew upgrade vapor |
In case you don’t have homebrew installed, you can install it from their homepage.
Deploy your project to Vapor cloud
The last step we need to make is to deploy the project. This is actually so easy that it took me less than 30 minutes from the opening of the documentation, to have the service up and running. Open your terminal on your project folder and start deployment by typing:
|
1 |
vapor cloud deploy |
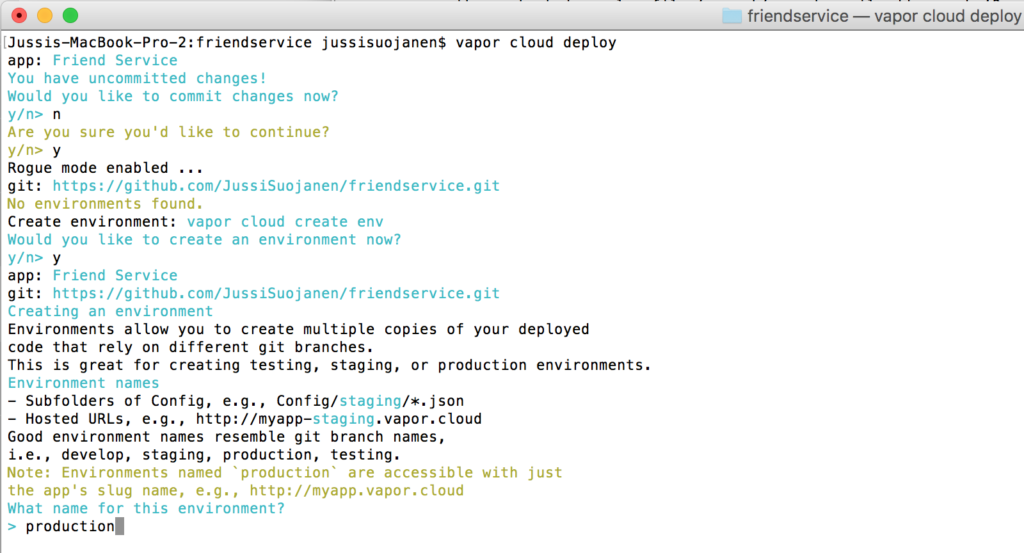
Choosing a production environment
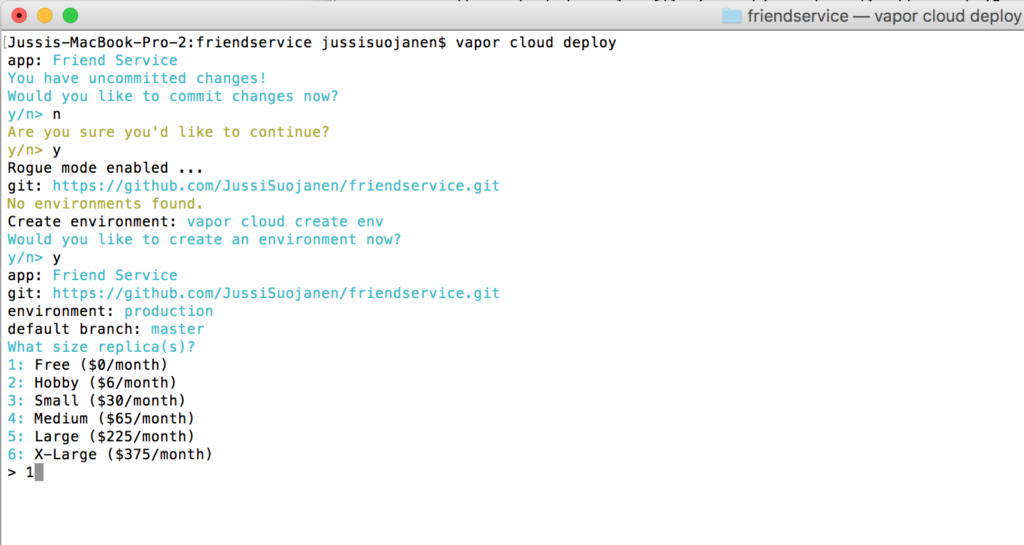
vapor cloud replica fees
The free replica can only have 1 tear at max and it also has a monthly request limit, but it is free forever. Since the service is not going to be used in any real application, let’s go with the free plan.
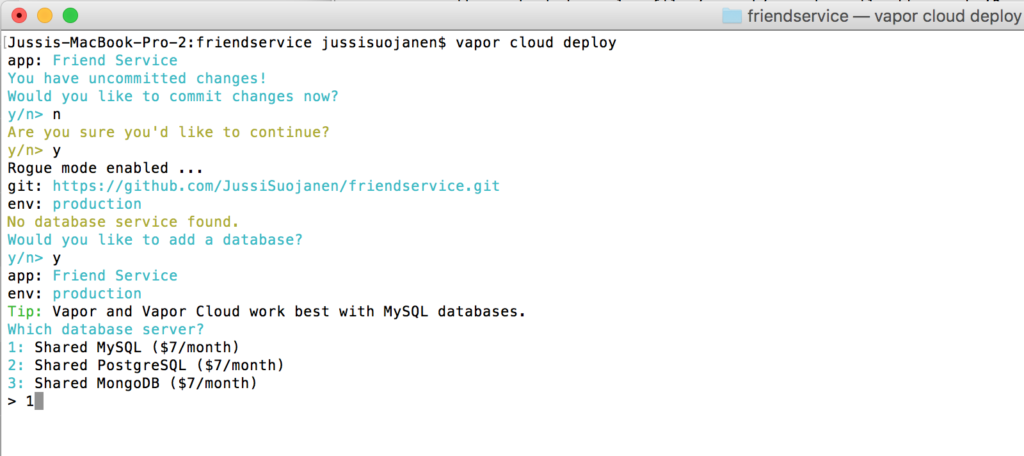
vapor cloud database monthly fees
As you see, databases cost 7$/month. This actually was a bit confusing for me since I didn’t have to give any credit card info. Still, I was able to use the service. After the service had been running for a while Vapor shut it down. I was a bit confused about why this happened. At this point, I thought the service was still in beta. The explanation came the day after when I received an email that I had “negative account balance”. I didn’t add any credits to the service, and since database is not free, the service was shut down.
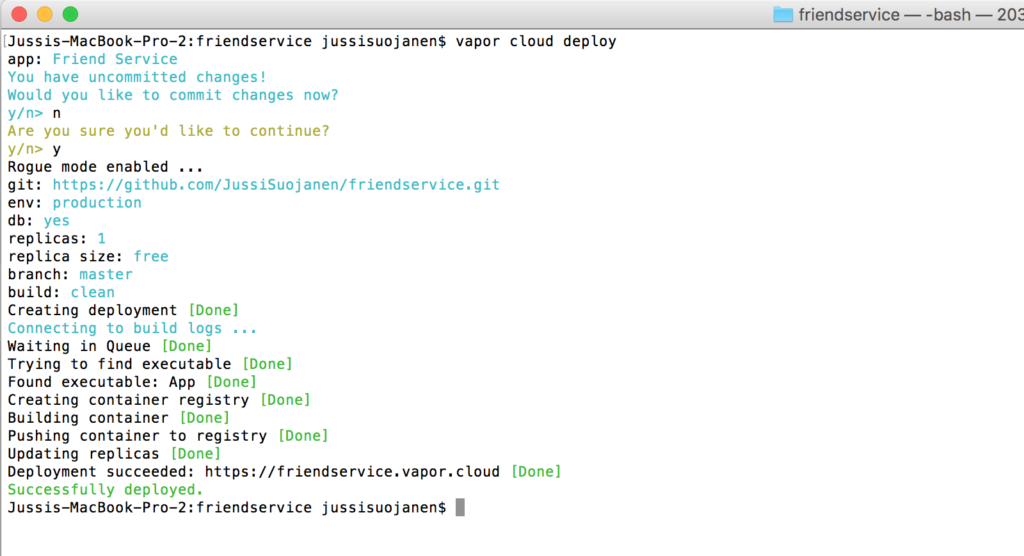
vapor cloud deployment complete
And after 5-6 minutes the deployment is done! You can check the service up and running in here: https://friendservice.vapor.cloud/listFriends.
Conclusion
The deployment process is super easy! It was quick and easy and fast and, did mention it was easy? It also lacked the usual “What now?!” -moments, which I had plenty with Heroku. Deployment to server and running web apps is not my comfort zone. I think that was the biggest reason I had to spend some time with Heroku. If you want to know more about the Vapor cloud, check the documentation. There is plenty of good information there and this post was only a scratch on the surface.
The web page wasn’t the most intuitive that I’ve seen. I had to spend some time to find how to stop and delete the service when I decided to write this post. I wanted to record and document the steps so I wanted to start over. The menu on the left side has different items depending on where you are on the service. This led to a situation like “where is that item now?” when I opened another page. I also had to delete the database manually and set the replica count to zero before I was able to delete the service. I couldn’t find where to set the replica to zero from the page, but you can do it from the terminal with a command:
|
1 |
vapor cloud deploy --replicas=0 |