Unit testing RxSwift application with XCTest framework
Unit testing RxSwift app is the topic I want to talk about today. This is the last part of the series How to use RxSwift with MVVM, where we have learned to use RxSwift by implementing the Friends application. The only remaining thing is to unit test the application. Unit testing RxSwift application is pretty much the same as unit testing a normal swift application. Once again the biggest change is that we handle all the callbacks and data updates with observers. In this post we’ll see how to:
-
Handle Observable and subscribe to events.
-
Mock network layer for unit testing.
-
Handle data validation in unit tests.
All the code that we’ll test is inside view models, so you’ll also learn how to unit test view model. In case you are not that familiar with the concept of unit testing, I suggest that you read my previous post about unit testing view model. You’ll get all the basic information and ideas about unit testing and also a little friendly reminder why you should always unit test your applications! 😄
Friends application
We will learn these things by unit testing an application called Friends. Friends application is an application that I implemented with MVVM pattern. With friends app, you can download a list of friends and display them to the user in a table view. You can also create, update and delete friend using the app. It’s a simple app, with just enough features to go through many of the basic things that you come across when developing an iPhone app. I wrote the Friends app first without RxSwift, and then I wanted to see how much the code changes if I use RxSwift. Incase you want to know more about the implementation of pure MVVM app check my posts about MVVM pattern with swift app. And if you want see how the we are testing today is implemented checkout this post: How to use RxSwift with MVVM.
All the codes can be downloaded from GitHub. Just remember to check out the RxSwift branch. But now let’s get down to business!
Unit testing RxSwift app
We’ll start by checking how to unit test FriendsTableViewViewModel. It’s a class that handles displaying a list of friends to the user.
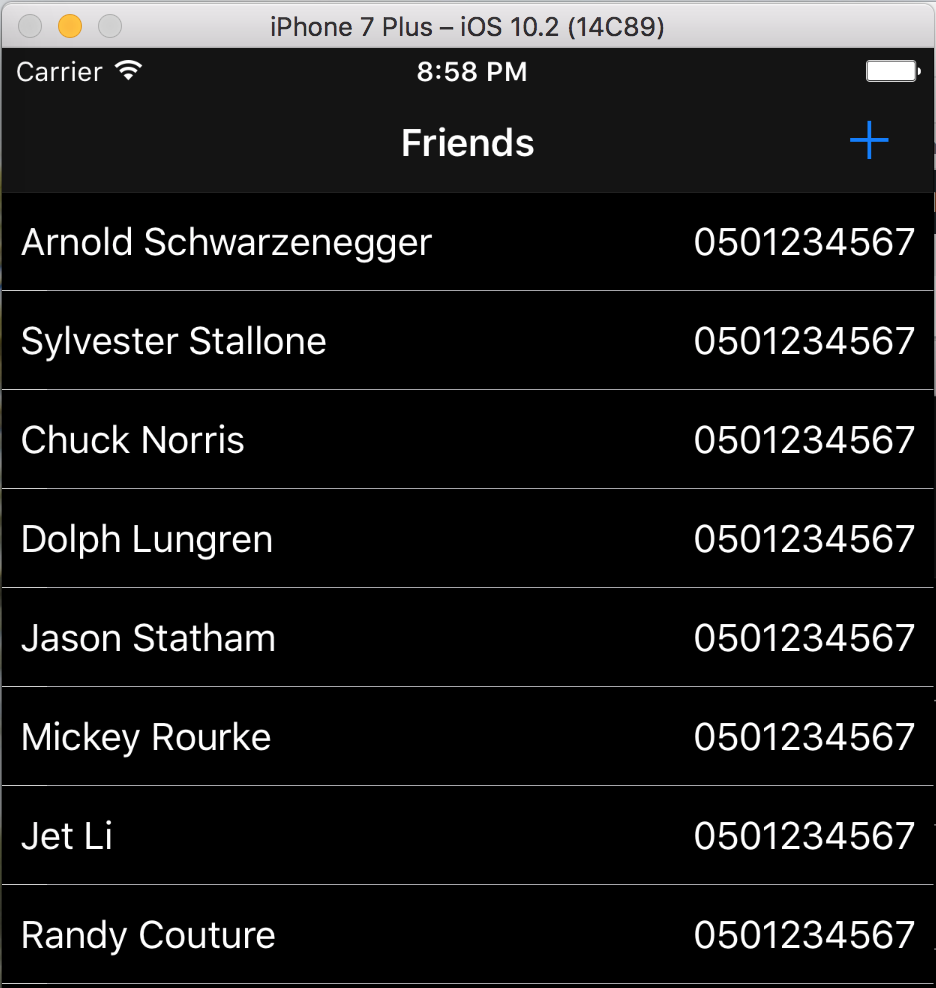
List of friends in the main view of the application
Since FriendsTableViewViewModel is making network request, the first thing we need to do is to mock the network layer for testing. Generally, we don’t want unit tests to make network requests because:
-
It might take some time to get an answer from the server, which makes running the tests slow.
-
The test might fail because of the network or server, which makes it impossible to reliably verify the test result.
By mocking the network layer, we can return a suitable answer for the current test case.
Mocking network layer
AppServerClient is the class that handles all the networking in the app. If we open the class, we’ll see that it has a function called getFriends. This is the function that we want to override for the first tests. It downloads a list of friends and then we display the list to the user. The function definition looks like this:
|
1 |
func getFriends() -> Observable<[Friend]> |
We could define a protocol that has all the same function definitions that AppServerClient has. Then we could make both the AppServerClient and our mock implementation to conform to that protocol. But since we don’t have the protocol already available we’ll use the good old inheritance instead.
|
1 2 3 4 5 6 7 8 9 10 11 12 13 14 15 16 17 |
private final class MockAppServerClient: AppServerClient { var getFriendsResult: Result<[Friend], AppServerClient.GetFriendsFailureReason>? override func getFriends() -> Observable<[Friend]> { return Observable.create { observer in switch self.getFriendsResult { case.success(let friends)?: observer.onNext(friends) case.failure(let error)?: observer.onError(error!) case.none: observer.onError(AppServerClient.GetFriendsFailureReason.notFound) } return Disposables.create() } } } |
MockAppServerClient inherits from AppServerClient and we have overridden the getFriendsFunction. The first thing we do inside the function is that we create an Observable that we return from the function. We pass a block for the create function and use switch for a variable named getFriendsResult.
getFriendsResult is the variable that we use to define the different results for our network requests. In success case it contains a list of friends and in failure case it contains an error. Later we’ll check how to define the value for our tests. Inside the switch statement we have defined .success & .failure cases and emit .onNext with a list of friends or an .onError with error value to the subscriber. We have defined the getFriendsResult as an Optional since we don’t want to define an initialiser for the mock class. That is why we also need to define the .none case in the function.
And last we’ll return a dummy disposable that the Observable.create needs as a return value. The first step in unit testing RxSwift app is done! Next, let’s write our first tests. We’ll use dependency injection to pass the mocked network layer we just created, and also set the getFriendsResult to match our tests case assertions.
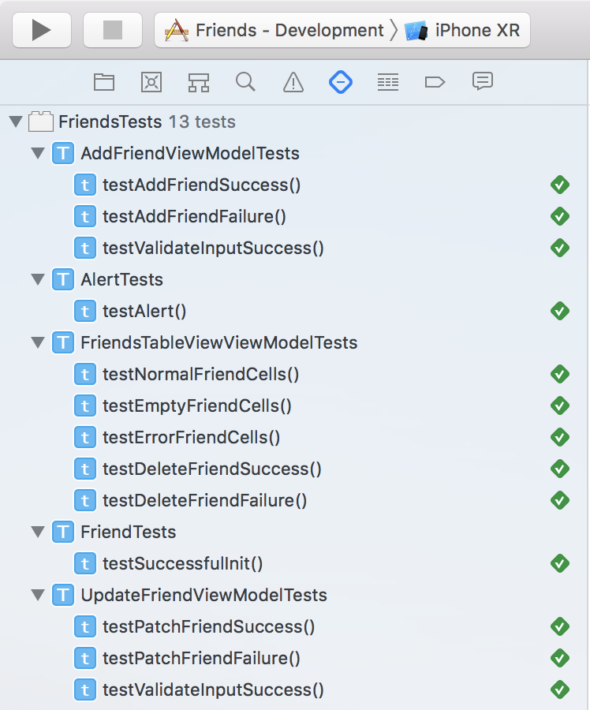
Unit testing RxSwift – FriendsTableViewViewModel
When testing requesting the friend list we also want to check that our view is in correct state when the request fails. That is why we’ll write two different tests here. A case when the request is a success and also one that is failing. Actually there is also a third state. The server returns an empty list of friends, meaning that our user has no friends. Just kidding, meaning that user has not uploaded any friend information just yet. This case is so similar to getting a list that actually contains friend information, that I’ll it leave to you to figure it out from code.
But first, let’s check the successful test.
Unit testing RxSwift – Successful friend request
|
1 2 3 4 5 6 7 8 9 10 11 12 13 14 15 16 17 18 19 20 21 22 23 24 25 |
func testNormalFriendCells() { let disposeBag = DisposeBag() let appServerClient = MockAppServerClient() appServerClient.getFriendsResult = .success(payload: [Friend.with()]) let viewModel = FriendsTableViewViewModel(appServerClient: appServerClient) viewModel.getFriends() let expectNormalFriendCellCreated = expectation(description:"friendCells contains a normal cell") viewModel.friendCells.subscribe( onNext: { let firstCellIsNormal: Bool if case.some(.normal(_)) = $0.first { firstCellIsNormal = true } else { firstCellIsNormal = false } XCTAssertTrue(firstCellIsNormal) expectNormalFriendCellCreated.fulfill() ).disposed(by: disposeBag) wait(for: [expectNormalFriendCellCreated], timeout:0.1) } |
Since we are using RxSwift, the first thing we’ll need to is to create a DisposeBag. Next, we’ll create our MockAppServerClient. Right after creation, we define the getFriendResult to a success and also set the payload to a dummy friend object. Friend.with() is static function that we have defined only for our testing target which helps us to create a dummy friend:
|
1 2 3 4 5 6 7 8 9 10 11 12 |
extension Friend { static func with(id:Int=0, firstname: String = "Jimmy", lastname: String = "Swift", phonenumber: String = "0501234567") -> Friend { return Friend(firstname: firstname, lastname: lastname, phonenumber: phonenumber, id: id) } } |
Next, we’ll create the view model that we want to test. When creating it we’ll give our mock networking client as a parameter. The technique is called dependency injection and it helps us to make our classes testable. In our view models initializer we have defined the parameter like this:
|
1 2 3 |
init(appServerClient: AppServerClient = AppServerClient()) { self.appServerClient = appServerClient } |
So, if we don’t give the networking client as a parameter, we use the default version (that actually makes network requests) instead.
Sorry for a bit clustered explanation 😅 but let’s continue with the test function code. Next, we’ll call viewModel.getFriends() and make sure cells are ready. Now that we’ll have all the things set up, we need to somehow confirm that our view model is in the correct state after we have downloaded the list of friends. This is where the XCTest framework shows it’s force. We’ll use expectation to create a variable called expectNormalCellCreated. The way that expectations work is that it needs to be fulfilled before a certain time (that we define in our test case) or the test is marked as failed. Here we expect that in the input data provided, the first item in the array that friendCells PublishSubject contains, is indeed a normal cell.
We’ll make sure this is the case by subscribing to the PublishSubject and check inside the onNext function that the first item is a normal cell. If the item passes that check, we’ll call fullfil expectation variable. We use XCTAssertTrue to check the content so that the test fails immediately in case of wrong input. In case our app has a lot of tests, this decreases the time it takes to run them. This way, we don’t keep waiting for a failing test case. After the subscribe() call, last the thing we need to do is to add the returned object to the disposebag.
Phiiuuff, finally we have everything set up. Now we only need to define a time limit, in which we need to fulfill the expectation. Again we’ll use a function from the XCTest framework. wait takes an array of expectations as a parameter (all of these needs to be fulfilled) and also a time limit in which those needs to be fulfilled. Since getFriends call in our mock class doesn’t make any network requests it is actually synchronous, so we can define the timeout to 0.1 seconds.
Now when we hit the run button, we’ll see that our test is passing. Next, let’s define the failing case!
Unit testing RxSwift – failing friend request
Our table view in friend view displays an error cell when an error occurs. This time we want to test that friendCells contain an error cell:
|
1 2 3 4 5 6 7 8 9 10 11 12 13 14 15 16 17 18 19 20 21 22 23 24 25 |
func testErrorFriendCells() { let disposeBag = DisposeBag() let appServerClient = MockAppServerClient() appServerClient.getFriendsResult = .failure(AppServerClient.GetFriendsFailureReason.notFound) let viewModel = FriendsTableViewViewModel(appServerClient: appServerClient) viewModel.getFriends() let expectErrorFriendCellCreated = expectation(description:"friendCells contains an error cell") viewModel.friendCells.subscribe( onNext: { let firstCellIsError: Bool if case.some(.error) = $0.first { firstCellIsError = true } else { firstCellIsError = false } XCTAssertTrue(firstCellIsError) expectErrorFriendCellCreated.fulfill() ).disposed(by: disposeBag) wait(for: [expectErrorFriendCellCreated],timeout:0.1) } |
The test case is very similar to the one that we just went through. But this time the getFriendsResult is defined as failure. Also, the if-case statement now checks that there is indeed an .error cell inside the array. Rest of the code is identical to the case we just went through, so you can figure it out on your own.
There is a lot more tests inside the FriendsTableViewViewModelTests class but all of them follow the same pattern as defined in these two cases. Check them out and if you have trouble, questions or comments just DM me on twitter or comment below and I’ll get back to you :).
Now, let’s check how we can validate user input data when unit testing RxSwift app.
Validate input data when unit testing RxSwift app
FriendViewModel is the type that is responsible for adding and editing friends. FriendViewController is the view that draws the UI. Depending on what we are doing, we’ll either pass AddFriendViewModel or UpdateFriendViewModel when opening the view. Both of them conform to the FriendViewModel protocol. Today we’ll check the AddFriendViewModel, which is used to add friends information to server, and see how we can write tests to it.
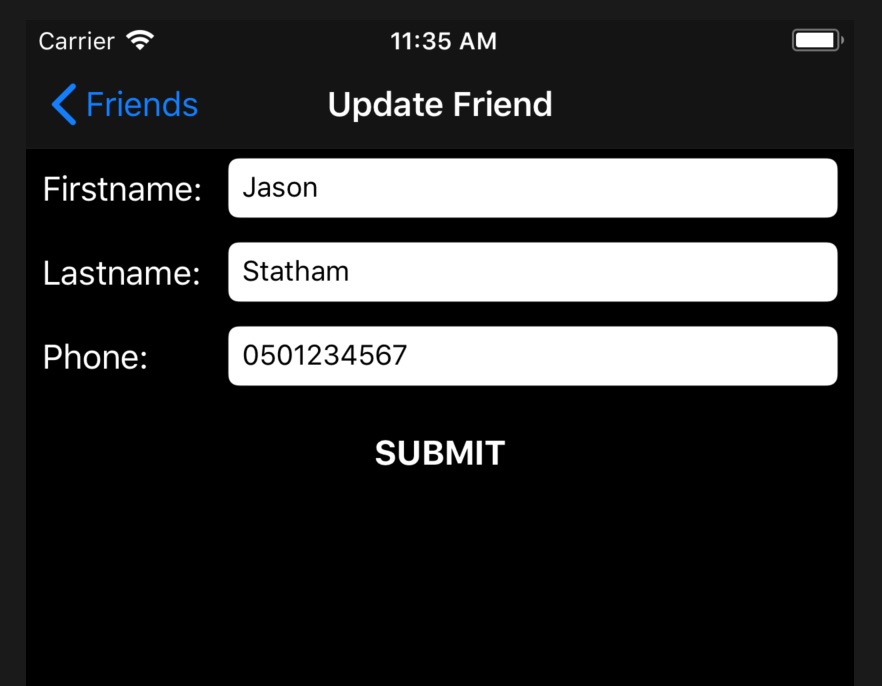
Unit testing RxSwift – add friend view
Testing AddFriendViewModel
To send friends information, all the fields: first name, last name and phone number need to be filled. First, we’ll check that field validation is working. We prevent the user from sending invalid information by disabling the submit button unless she has provided valid data. We can test this by subscribing to an Observable named submitButtonEnabled. It emits an event whenever data is changed and we can subscribe to it to check the state. Inside the AddFriendViewModelTests we have a test called validateInputSuccess which does all this.
|
1 2 3 4 5 6 7 8 9 10 11 12 13 14 15 16 17 18 19 20 21 |
func testValidateInputSuccess() { let disposeBag = DisposeBag() let mockFriend = Friend.with() let appServerClient = MockAppServerClient() let viewModel = AddFriendViewModel(appServerClient: appServerClient) viewModel.firstname.accept(mockFriend.firstname) viewModel.lastname.accept(mockFriend.lastname) viewModel.phonenumber.accept(mockFriend.phonenumber) let expectUpdateSubmitButtonStateCall = expectation(description:"updateSubmitButtonState is called") viewModel.submitButtonEnabled.subscribe( onNext: { state in guard state else { return } expectUpdateSubmitButtonStateCall.fulfill() } ).disposed(by: disposeBag) wait(for: [expectUpdateSubmitButtonStateCall], timeout:0.1) } |
The code looks very familiar. We create disposeBag, mockFriend and mockAppServerClient variables. Then we’ll create a viewModel and use dependency injection, so that our mock network client is used. The mock network client, defined for AddFriendViewModelTests, is so similar to the one that just went through, that you can figure it out straight from the code.
Next, we’ll set the data for the user inputs: first name, last name, and phone number. After that, we once again create an expectation, this time for submit button state change. Then, we subscribe to the event, and fulfill the expectation only after the state emitted is true. In the last line of the test, we use the wait, and wait for the expectation to be fulfilled. And that’s it! Now we have tested that our data validation is working.
Now let’s check the last test that we’ll go through. A successful case of adding a new friend.
Unit testing RxSwift – testing successful friend creation
|
1 2 3 4 5 6 7 8 9 10 11 12 13 14 15 16 17 18 19 20 21 22 |
func testAddFriendSuccess() { let disposeBag = DisposeBag() let appServerClient = MockAppServerClient() appServerClient.postFriendResult = .success(payload: ()) let viewModel = AddFriendViewModel(appServerClient: appServerClient) let mockFriend = Friend.with() viewModel.firstname.accept(mockFriend.firstname) viewModel.lastname.accept(mockFriend.lastname) viewModel.phonenumber.accept(mockFriend.phonenumber) let expectNavigateCall = expectation(description:"Navigate back is called") viewModel.onNavigateBack.asObservable().debug().subscribe( onNext: { _ in expectNavigateCall.fulfill() } ).disposed(by: disposeBag) viewModel.submitButtonTapped.onNext(()) wait(for: [expectNavigateCall], timeout:0.1) } |
Now, this is a familiar drill to us. Disposebag, mocking network, creating view model, setting input data and setting up an expectation. After we have successfully created a friend, we’ll navigate back to the friend list view. We know that the navigation is done after the onNavigateBack is emitted. So, to verify that our data is passed to the server we just make sure the expectation is fulfilled only after the onNavigateBack is called. After that we’ll call onNext for submitButtonTapped to start sending the information to server. Normally this is done by the user who pushes the submit button in the UI. If the server response is what we expected, which is it since we just defined it to be what we want, eventually onNavigateBack is emitted. Now, when we run the test, we’ll see that it passes.
You can also find [rad-h]testAddFriendFailure[/rad-hl] cases in the [rad-h]AddFriendViewModelTests[/rad-hl] class. We won’t go through that since we already have all the information we need to implement the test. In case there is something that you don’t understand please ask and I’ll explain it to you.
Conclusion
That is all that I wanted to go through today! We learned how we can test view models when using RxSwift in the project. We also learned how to mock network layer and use dependency injection to use it in our tests. All this is pretty simple once you go through it, but the first time might be a bit difficult. I hope I was able to help you and I hope to see you here again! Now, thanks for reading and have a great day my friend!